
White-throated Sparrow
Greenwood, DE
You cannot beat seeing this species in its breeding plumage.


White-throated Sparrow
Greenwood, DE
You cannot beat seeing this species in its breeding plumage.
To read Part 1: Logistics click here.

Castle Howard
After a week of nothing but rain, I got a small reprieve. At least the overcast clouds made for dramatic photos.
I identified seven bases for my summer travels to England: London, Oxford, Hadrian’s Wall, Lake District, York, the Norfolk Coast, and Bath. Due to transportation and lodging difficulties, I would also spend a day and a half each in Carlisle and Cambridge. Once the logistical plans were complete, major travel and lodging booked, I could sit down and make daily itineraries.
Setting daily itineraries that account for every minute of every day are not my thing. Instead, I allow for flexibility by identifying high priority locations and selecting a few nearby places to complement them. After identifying the bases from my Google Map I began to delete locations more than 1-2 hours from each base. I was still left with many more locations than I could visit in five weeks! Narrowing the list down was a difficult and arduous process. Several key questions and criteria helped me narrow down the choices:

Blenheim Palace has some restrictions on photography inside the house. There are still plenty of places to photograph around the property.
Did the location allow photography? While I visited locations that didn’t allow photography (ex.: British Library exhibitions), this was a careful consideration when selecting sites.
Opening and closing times are perhaps the most frustrating part of travel, in my opinion. Most attractions I came across in England are open from 1000-1700. This is quite a narrow band if you like to visit more than two places in a day. Especially if they require travel time or if you want to take time out for lunch.
However, some attractions may extend their hours on a particular day of the week or time of the year. For example, the Roman Baths extend their hours to 2200 during the summer months and many museums in London open late one day of the week. For example, the British Museum opens late on Fridays. Looking for extended hours and incorporating them into the itinerary meant losing some flexibility. Luckily, many of these activities were indoors and would not need a backup in the event of inclement weather. Other time considerations included taking advantage of guided tours at different museums and attractions.
Transportation was a complicated and tricky factor to consider throughout planning each section of my trip. Travel prices greatly vary depending on the mode and time of day. Thus, transportation played a large impact on developing my itineraries.
An important consideration when visiting an attraction, particularly those out-of-town, must come down travel time. Are you spending more time getting to a location than you might spend there? This effectively eliminated many of the excursions on my short-lists. The notion of spending two hours on a bus to spend three hours at a location didn’t make economic sense. As a result, I removed locations like Stonehenge from my list. This didn’t completely discourage me from taking day trips, but if the destinations didn’t offset the cost and time of transportation I couldn’t justify going.
Walking time also had to be a consideration. While Google Maps helps calculate and give options for walking times, it was important to consider my personal walking time. This was where training for my trip came in handy! Google Maps generally calculates walking times around 3 mph, or 20-minute miles. Nowhere in my vacation did I even consider a walking speed of 3 mph! Unless the distance covered less than half a mile I generally rounded half an hour into each mile for hiking distances and 15 minutes to a city mile. At least if I ended up walking faster it gave me more time to explore a destination.
I hate crowds! Personal space is something to be respected! I don’t like wading through crowds of people or standing in obscenely long lines. Crowds of people in my photos are also something I like to avoid. As a result, I effectively took places like Westminster Abbey off my list.
While crowding is usually a given in most city sightseeing areas, there are usually tips provided by attraction websites or on sites like TripAdvisor on how to avoid it. When conducting research for destinations like Blenheim Palace I was able to identify when the tour buses arrive or leave. This allowed me to plan a little smarter.

Last minute add-in event: Turma! Roman calvary event in Carlisle. Definitely worth the inconvenience of shifting my itinerary last-minute.
hardest consideration to accommodate. Last minute additions to my itinerary had to be carefully evaluated as to how they would interfere with my plans. Would it move another item, decrease valuable transportation time or require that another item be completely removed? Case in point, the addition of the Turma! between my bases at Hadrian’s Wall and the Lake District created a headache that was well worth the effort. Adding in the two-hour event in Carlisle meant rearranging important transportation transfers in both Carlisle and the transfer in Penrith. This meant taking the last bus from Penrith to Patterdale, which to me was risky. Other special events included concerts such as the lunchtime concerts at St. Martin-in-the-Fields in London, evensong and classical performances at Cathedrals and Churches, talks and lectures at various museums.
In the end, whatever I missed only gives me the excuse to visit again.
When, is the only question!
Blog posts on my summer trip to England are long overdue! While I’m sure most of my readers are more interested in the pictures and itineraries, I feel that it is also important to explain how I planned for a 5-week solo trip overseas.
Logistics of a Long Trip
I spent the better part of 8 months planning, booking and building an itinerary for a 35-day trip to England. The majority of this time was spent on overall logistics and building itineraries.
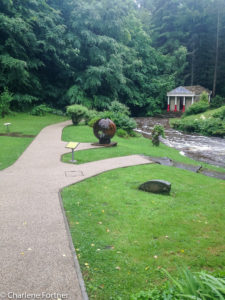
Rain, Rain…go away!
@ Vindolanda
The paving stones meant to allow you to cross the stream to the temple are completely flooded thanks to non-stop rain for most of my trip at Hadrian’s Wall.
I cannot bring myself to go on a vacation without a plan; whether it is for a day or a week. For me, this does not mean planning every minute of every day. Simply put, the task of creating and using a daily itinerary gives me a piece of mind. It allows me to enjoy myself more than if I were to wing it and feel like I missed something. My itineraries usually allow for flexibility and include research for back-ups when weather and transportation snafus require detours. In my previous travels, I have dealt with these occasions resourcefully and with a care-free attitude. English weather made sure that my planning was tested this time around as well.
The prospect of moving my luggage to a new lodging every day or two was unappealing. For this reason, I decided to create “bases” from which I could explore an area for 3-5 days. The most daunting part of planning a trip of this magnitude was to identify where to visit and how long to stay.
Weeding out my impossibly large bucket list was a grueling task.
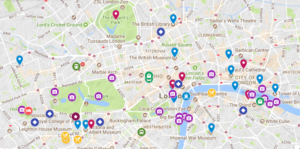
Screen Shot of Google Maps for Base: London
Amazingly I did more than half of the items marked on this map! (In 9 days, of course.)
I used Google Maps to add possible attractions I was interested in. Useful sites for research included the National Trust, English Heritage, and the Historic Houses Association. After adding the possibilities to the map, then began the weeding process. My first criteria for culling was simple: which places could I visit by public transit without walking more than 1 mile. If I had to walk more than that, was the location somewhere I could spend all day (ex. Blenheim Palace)? I also compared and eliminated similar sites. For example, how many museums on Roman history did I really need to go to? This managed to narrow down my sites into reasonable geographical pockets to make bases.
My final itinerary focused on 7 regional or city bases. Off the bat, several bases were non-optional: Hadrian’s Wall, London, and York. Of the remaining areas I used several criteria to narrow down my bases:
Despite missing a few items on my must-see list, the additional bases I settled on were Oxford, the Lake District, Bath, and the Norfolk Coast. I ended up spending only one night each in both Carlisle and Cambridge due to breaks in transportation between bases. I also split my time in London to spend time at the beginning and end of my trip there.
The next big decision to make was what order to move from base to base, what time of the day to travel and what mode of transportation to take.
A circular route would be more favorable, both due to cost and to reduce travel time between bases. However, some of the bases I chose were centered around specific events which complicated the order. I was also constrained by the availability of lodging due to some festivals. Not to mention, the Lake District can book up months in advance, something I did not plan for (surprisingly).
An important consideration was what time of the day to travel. My preference is to travel in the early morning or late evening to maximize sightseeing hours during times that many attractions are open: 1000-1700.
While train travel is faster, it is also more costly. I compared the cost, timetables of available routes and length of travel time using the research tools of Rail Journey Planner (train), Megabus and National Express (both coach bus). I created a plan utilizing both rail and bus routes between bases. Some transfers were a combination of both because rail travel can’t get you everywhere! With the exception of one transfer that involved an overnight bus, none of the base transfer legs took more than three hours, and most were less than two.
Lodging was by far the most complicated and stressful part of the planning process due to my budget. The majority of lodgings available to me would be hostels, bunkhouses or cheaper B&Bs. The majority of my bookings were made through the YHA Hostels.
I did utilize TripAdvisor to check reviews, however, I always take these with a grain of salt and try to read a lot of current reviews to get a feel for the places. Many people have a varying degree of tolerance for certain features of a place and I don’t tend to be picky at all. I certainly don’t care if the cafe is awful at a place if I don’t plan to eat there. I purchased a membership with Hostelling International which entitled me to a discount when I checked in to the YHA hostels.
Unfortunately, this process did not go without a hitch. When I began to make my reservations, about five months prior to leaving, I came to realize that some of my chosen accommodations were already booked or were booking up fast! This caused a cascade of revisions to several parts of my trip:
This was the first extended trip I planned without access to a car. My goal was to keep the total weight of my bags under 30 lbs/14 kg. (I did this!) For a few days along Hadrian’s Wall I would have to carry all of my items for several miles. This goal also allowed me to bring back souvenirs and stay under the airline baggage weight limit.
Part of my planning process required researching options for luggage storage. Left luggage facilities are becoming extinct. Heightened security has seen many of these services become discontinued. Most rail stations do not offer self-service lockers anymore (do any of them?). I had to choose hostels or B&Bs that provided some form of luggage storage before and after check-out. In the case of the hostels, this required renting a locker or paying a fee. It was helpful to search the reviews on TripAdvisor for more information and read the experiences of other travelers on this matter.
On most days I stored my backpack at my accommodation and carried my day bag around town. When selecting a day bag, I chose one that could easily fit inside of the larger backpack on the days that required me to carry all of my things. This also meant leaving enough space in my backpack to accommodate all of my things!
Along Hadrian’s Wall I utilized a baggage transfer service that moved my luggage between accommodations so I was able to carry less while hiking long distances. These services are common along the long-distance trails in the UK.
The school year is well under way and I’m already feeling overwhelmed. I have not been able to go out birdwatching since August! However, this has not kept me from keeping my eyes on the horizon. Plans are developing for a 10-day trip to Texas for Spring Migration in April. I am working on a slew of posts about my trip to England. I can’t wait to share many of the thousands of pictures I took and my many experiences. Most importantly, I can’t wait to do it again!
For now, I’ll leave a map preview of my April plans:
Click here to view this photo book larger
In just a month’s time I’m heading out for my first overseas trip!
Today, I spent about an hour getting all of my gear together and packing my day bag and backpack. While I still have a few items to procure, a few I can’t pack until the day before and some items I need to print, I was able to get a clear idea of how much weight I can expect to carry and how to organize my things.
The last time I embarked on a month-long trip I over-packed; and that is a massive understatement. Luckily, I had a car to pack everything in and I didn’t have to lug anything around. This time I’m on my own two feet, using public transit and have to adhere to strict airline baggage guidelines:
1 personal item: 17x13x10in, max.: 22 lbs
1 carry-on item: 22x18x10in, max: 26 lbs (Which is costing me $100 round trip in baggage fees!)
While the total allowance is up to 48 lbs, I want to keep my baggage under 30 lbs. There are 6 days where I must carry ALL of my items for an extended distance. On two occasions I must carry it for up to 9 miles. On most days I will leave my backpack in a locker at my accommodation or in my room.
I have a REI Trail 40 Women’s pack I purchased two years ago. I really love this pack! It is well padded, has several external pockets and plenty of straps for gear. Most importantly, it is very comfortable to wear on extended hikes.
After packing, the backpack weighed in at 14 lbs. Honestly, I was a little surprised as I expected it to be heavier. The items I have left to pack will probably add another 3-4 lbs. And I’ll have plenty of space here with the help of a compression sack.
When it is all packed, everything I intend to put in my pack is as follows:
I recently purchased an REI Flash 22 Pack in black. I had eyed the Flash 18 but decided on the 22 because of its more appealing and functional top clasp more than anything else.
The packed day bag weighs in at 9.5lbs. I’m waiting on a lens I rented which will add 1.5 lbs. After adding my cell phone and other small items it will probably top out at around 12-13 lbs. I am only slightly concerned as I expected this due to my camera gear.
I’m placing the two guidebooks in my day bag so that I have access to them on the plane. Once I’m off the plane I’ll probably store them in my backpack. These two books add approximately 1.5 lbs of weight that will be transferred out of the day bag upon arrival. This weight however, will most likely be replaced by filling the empty water bottle.
While I’m not necessarily trying to get around the weight requirement, there are some items I will carry on my person or wear on the plane.
I’m also traveling with a few necessary items kept in various locations, whether it be my backpack, day bag or on my person:
The following items just made more sense to purchase when I arrive rather than before:
So combined, I’m looking at a total bag weight around my goal of 30 lbs. Not bad! My hope is that on the days I am transferring to a new location that I can fit my day bag inside my backpack so that I only have to handle and watch one bag! As of today I could do that, but I am still missing some items and I would need to carefully assess the locations of my electronics.
Last weekend my mother and I revisited Huntington Beach State Park as a day trip. It was a beautiful, sunny day.
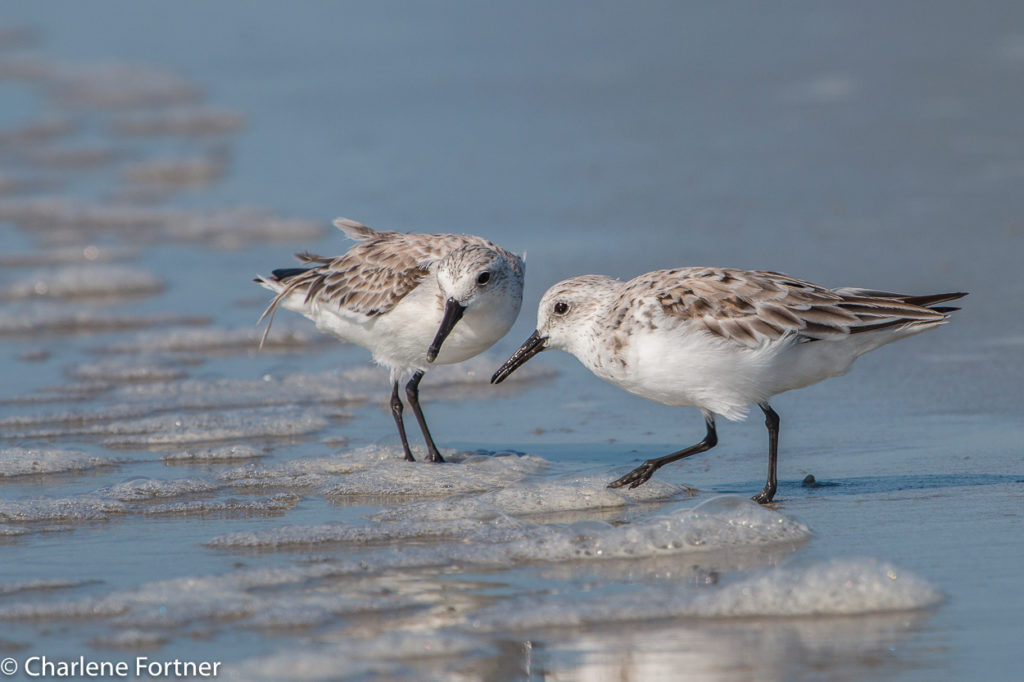
Sanderling
Huntington Beach SP
April 2017
We hiked from the beach north to the jetty and back. Along the beach we found several groups of Sanderlings, Willet, gulls and pelicans. A few fly-bys of Whimbrel and Killdeer.
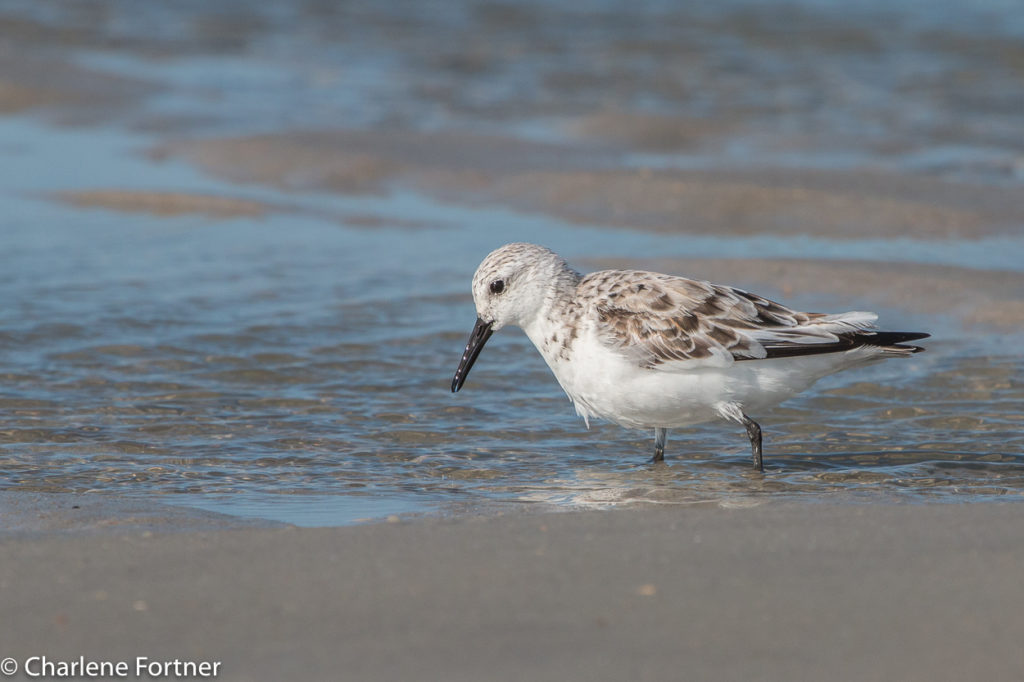
Sanderling
Huntington Beach SP
April 2017
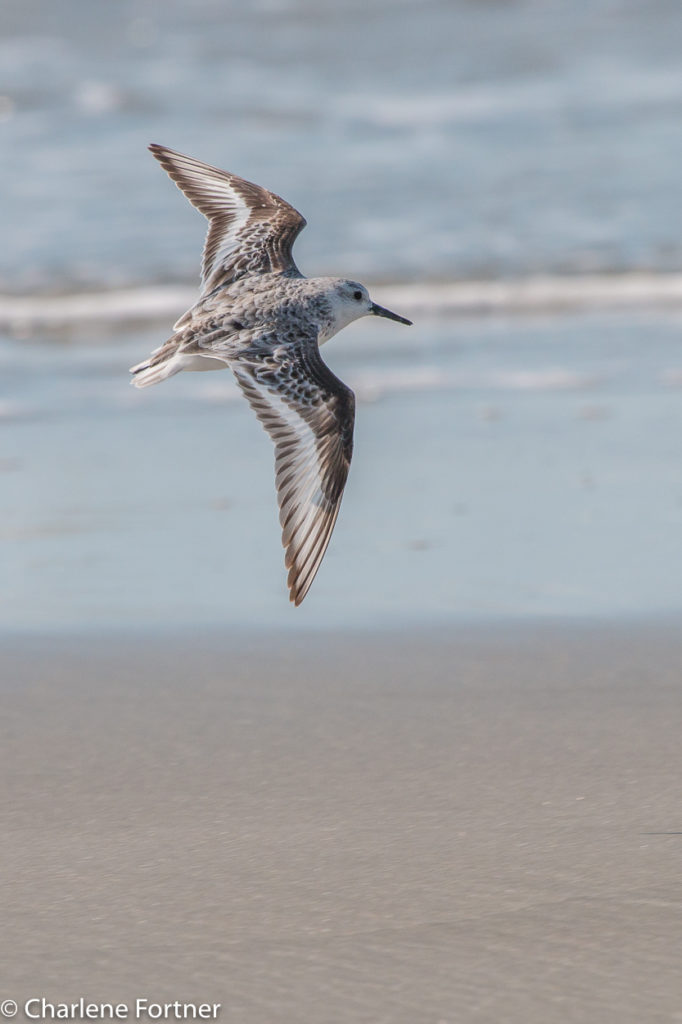
Sanderling
Huntington Beach SP
April 2017
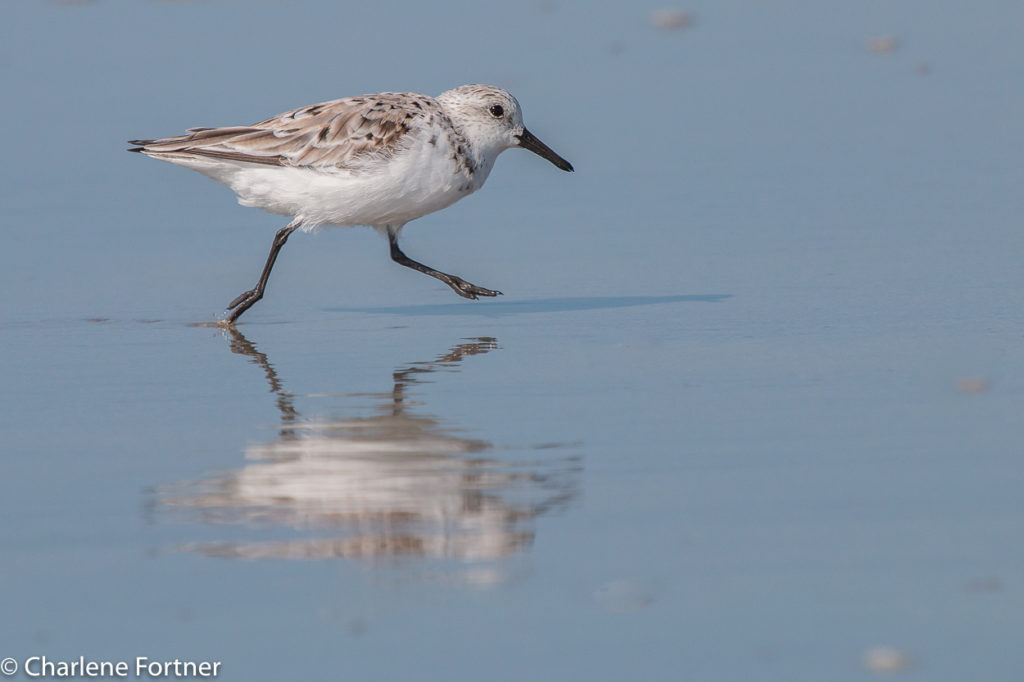
Sanderling
Huntington Beach SP
April 2017
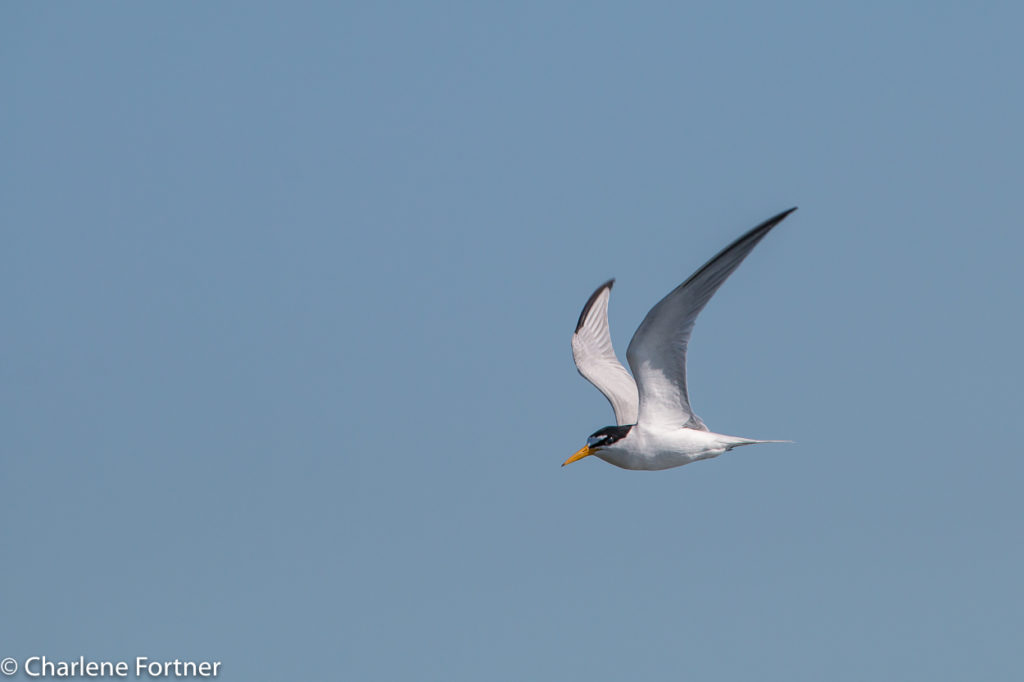
Least Tern
Huntington Beach SP
April 2017
After getting back to the car the temperature had climbed. The wind on the beach made the heat bearable; inland, not so much. Bird activity was moderate, making me wish we had started an hour or two early. At the beginning of the marsh boardwalk we did spot a male and female Painted Bunting, but I was unable to get any decent photos.
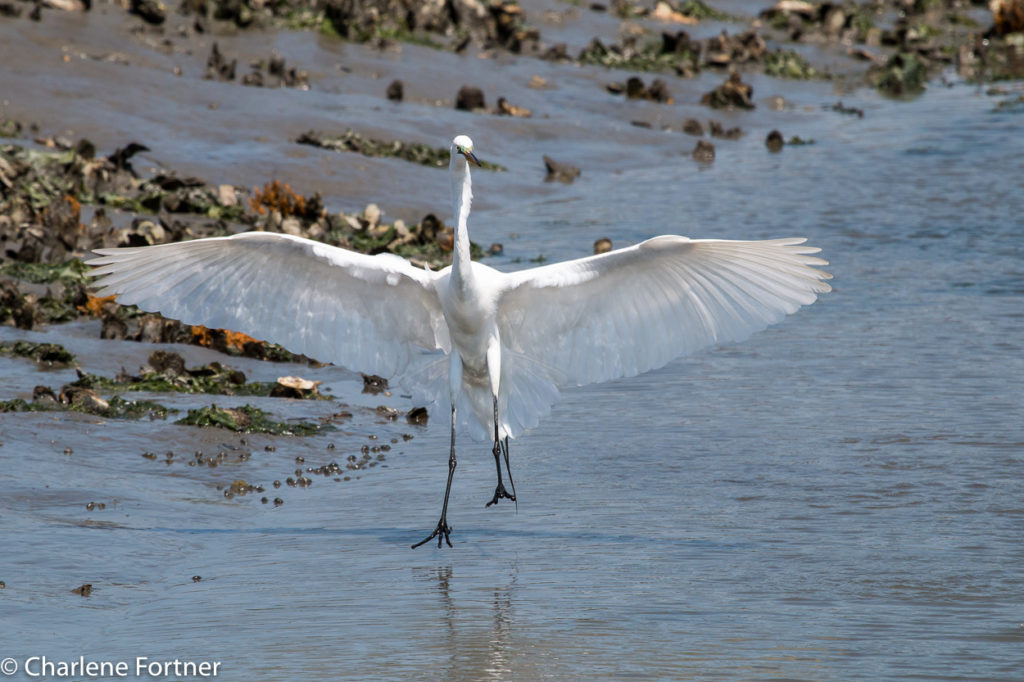
Great Egret
Huntington Beach SP
April 2017
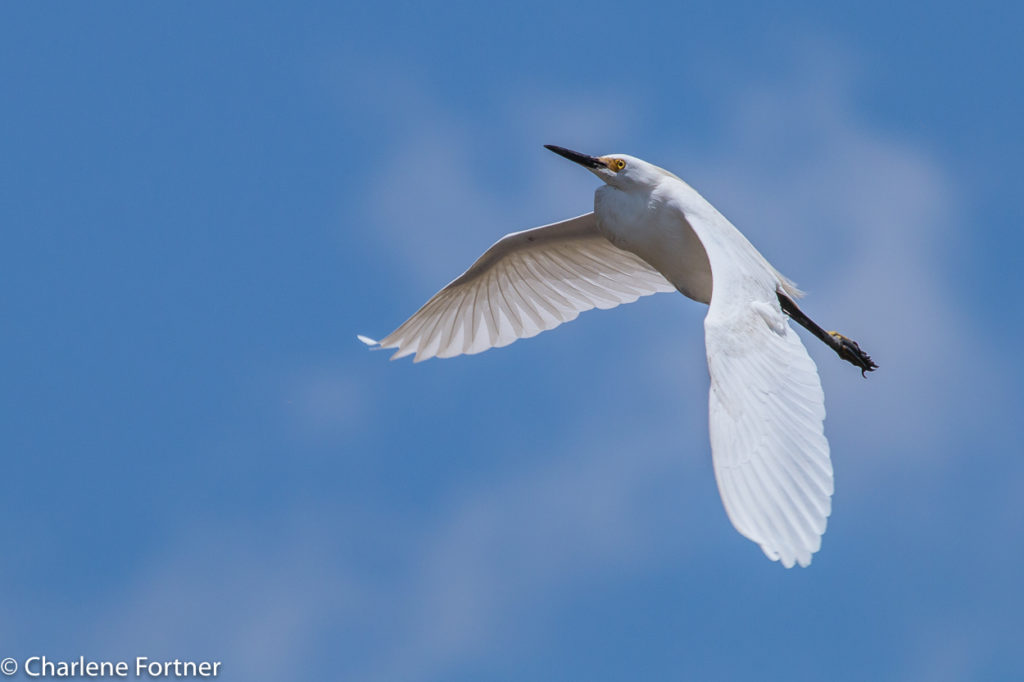
Snowy Egret
Huntington Beach SP
April 2017
Overall, I was very happy with my photographs for the day. I had a large percentage of keeps. In post processing the photographs above I had to reduce highlights, but overall I exposed the photographs very well using a 1/1600 or 1/2000, f/9 or f/10 combination.
Yesterday I spotted a large plume of smoke near my house. While heading out to investigate I crossed over the bridge at the High Rock Dam. Out of the corner of my eye I saw large white dots and was intrigued. I turned around and waited for the road to clear so that I could stop on the bridge where I observed several American White Pelicans!
I quickly returned home to grab my camera and set back out. The picnic and parking area by the bridge afforded great views. I also walked closer towards the dam for a better vantage point to observe the pelicans. Unfortunately, no Bald Eagles, which are also common in this area.
*This post is part of a series about a road trip completed in 2015. For the first post in this series click here.*
When I lived in Alaska, driving six hours from point A to point B without stopping seemed like the norm. There was beautiful scenery to look at and many animals to keep an eye out for. Nowadays, I find it difficult to drive such a stretch without stopping at least once. Perhaps the highways on the east coast do not provide enough visual stimulation to keep my interest. Or my stamina behind the wheel is waning, who knows?
I usually plan a stop in advance for most long car trips. For instance, my favorite stopover on my NC to DE trip is Eastern Shore of Virginia NWR just north of the Chesapeake Bay Tunnel. The refuge visitor center is secluded, offers a dog walking area, clean bathrooms and is never busy, unlike the highway rest stop less than a mile away.
When I planned my summer road trip I wished to maximize the amount of time spent at my destination. This called for extended travel days at the beginning and end of my trip. I carefully looked for places where I could stretch my legs and get in a little bird watching. Ebird was an essential tool in this part of my research. Their hotspot tool enabled me to find high-density locations nearest to my route.
Planning for safe highway rest stops with dogs is a little more tricky, but there are quite a few websites that provide listings for free dog parks and pet-friendly rest stops along the major US Interstates.
I wrote about my stopover at Mermet Lake WMA already, but I would like to share my favorite photo again, a stunning Great Blue Heron.
In the case of a road trip, it is always a good idea to keep an eye out for a great opportunity. Unexpected photographic inspirations or unique roadside attractions can pop up without notice. Sometimes traffic, or a lack thereof, allowed me to observe the weather or animals from the road without fear of causing an accident. I was able to slow down to a stop on the road or pull off on the shoulder to snap a few photos along the way.
The photos below were taken with my iPhone 5c. The photo on the left was the result of bumper-to-bumper traffic on I-70 in Missouri. The construction work never seemed to end. Occasionally a deserted stretch of highway would allow me to drastically slow down for a quick picture. The photo on the right is from Montana on the way to Devil’s Tower. I wonder if X marked the spot to something spectacular? 🙂
As luck would have it, I came across a small herd of Pronghorn on a secluded byway in northern Utah. Here I was able to stop in the middle of the road for 30 minutes to observe them without worry of oncoming traffic.